Warping in Ableton
Introduction to Warp in Ableton
What is Warp?
Warp is a very powerful feature inside Ableton Live which allows you to time-stretch audio clips without affecting their pitch. The Ableton manual refers to Warping as: “changing the speed of sample playback independently from the pitch”. This is quite a jargon-y description; the most important thing to remember is that when we refer to Warping, we are referring to Ableton’s own term for the process of time-stretching audio (with a few bells and whistles attached to it).
Warp has many uses: speeding up or slowing down a sample to match the tempo of your project, changing the rhythm played by a drum loop, transforming and mutating samples into new and exciting sounds for your music; Warp can do all this. In this article, we are going to take a look at how this feature works inside Ableton, and how it can bring a huge amount of control and creative potential into your music production workflow.
If you want to discover more features of Ableton, it is a great idea to learn from someone with all the experience. Here at MusicTeachers.co.uk we have professional, qualified teachers to suit your needs.
How does 'Warp' work in Ableton
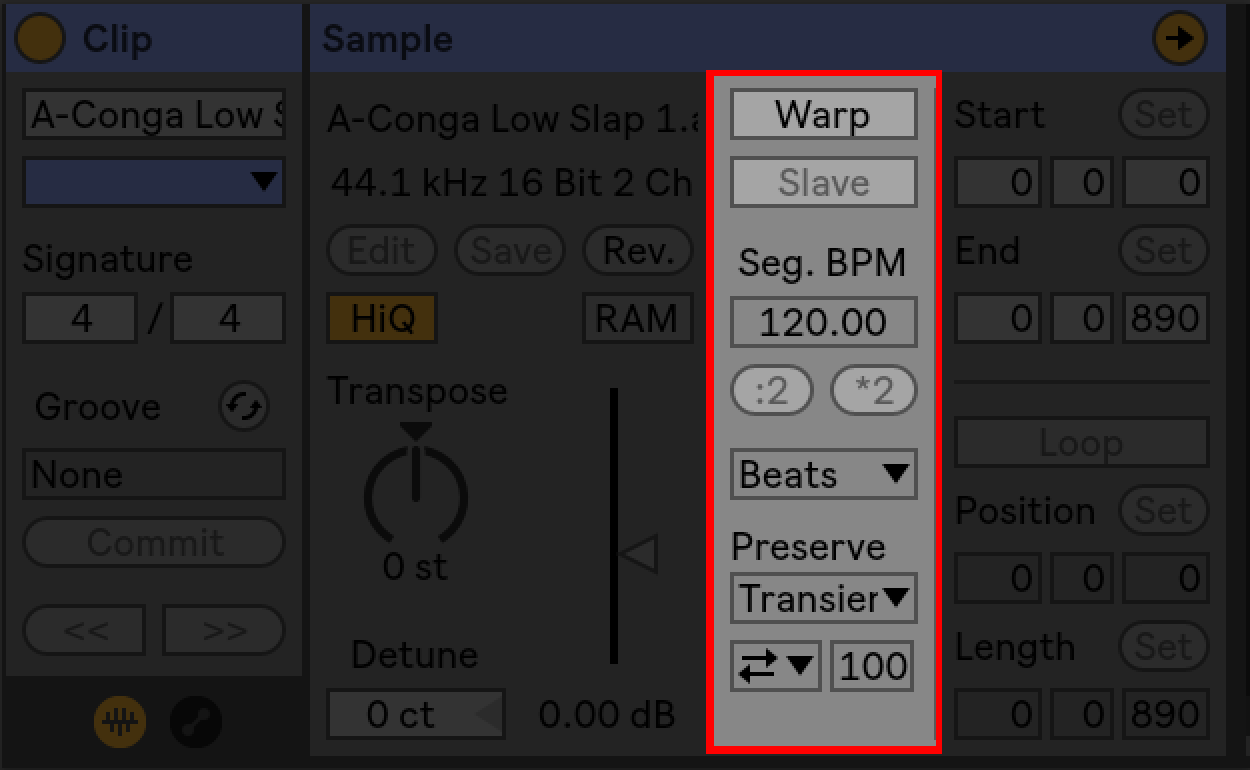
Warp is usually switched off by default for one shots (such as a single drum hit). This is because Ableton doesn’t expect you to need to time stretch this type of audio clip (one of the most common Warp uses) to fit the BPM of your project as it is only a singular hit, it has no tempo. When warp is switched off, the Warp button on the picture above will be grey. we can not affect any time based changes to our audio sample if Warp is switched off.
We can Warp (time-stretch) any audio clip in Ableton. To Warp audio, we first need to access the Warp Menu, which we can find in the Clip View of our respective clip. Double click on any audio clip, and you will see the Warp Menu appears in the right side of the Clip View. Don’t be intimidated by all the controls in here! We will go through them piece by piece.
To begin with, let’s Warp some audio. Create a new Audio Track, and then select: Packs/Core Library/Samples/Loops/Hip Hop/Dirty Neptune, and import the sample onto your Audio Track.
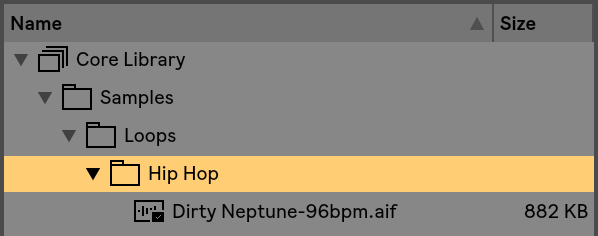
You will notice that the BPM of this sample is stated as 96BPM - when you bring it into your 120BPM project however, you will hear that the sample has snapped to the project tempo. This is because Warp has automatically assessed the BPM of the audio sample, and has time-stretched it to the BPM of your project. To verify this, you can change the BPM of our project - notice that the sample's speed follows that of the project.
In the Warp Menu for our Dirty Neptunes sample, you will note the Warp button is yellow - this indicates that Warping is now activated on this clip and we have a host of features to play with.
Transient Markers and Warp Markers
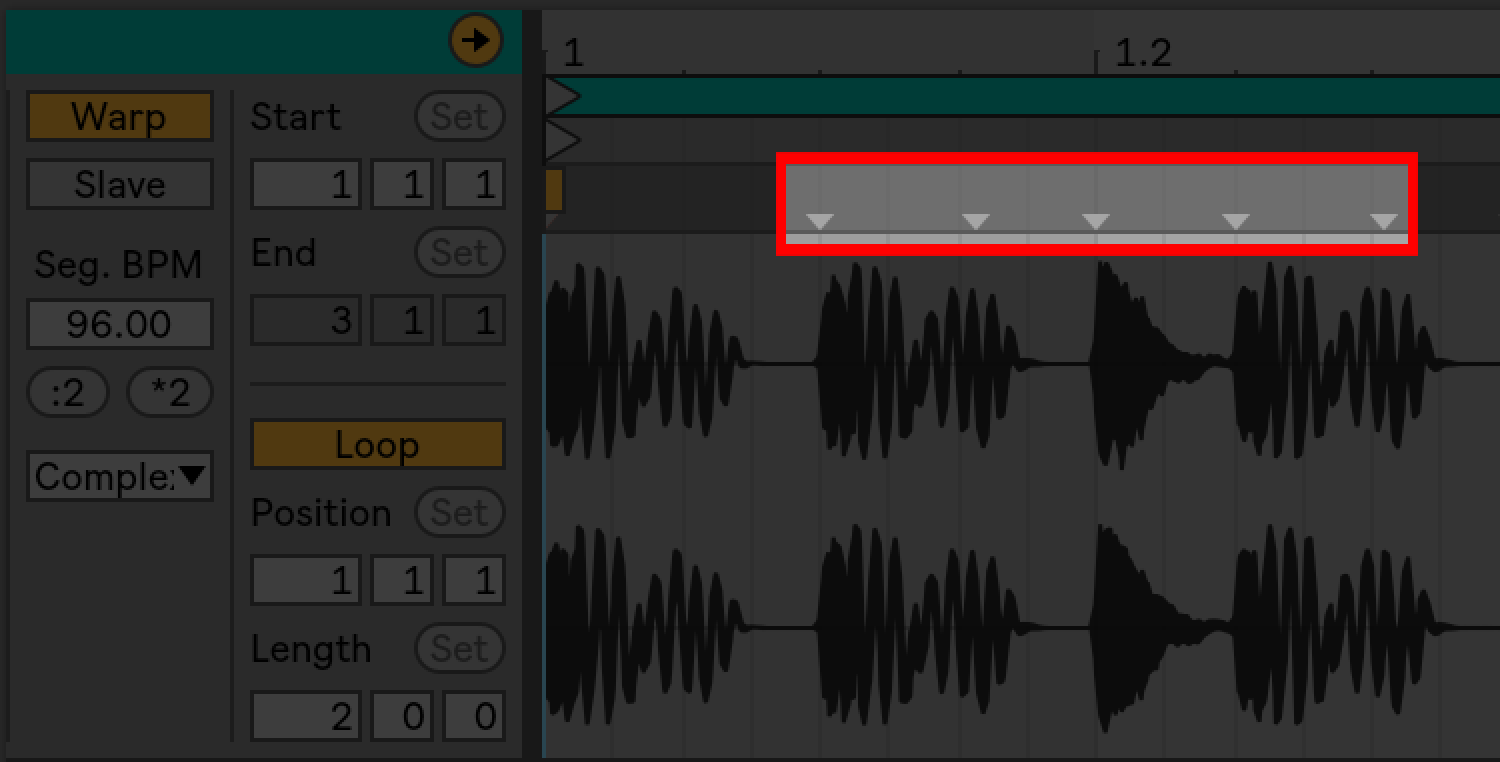
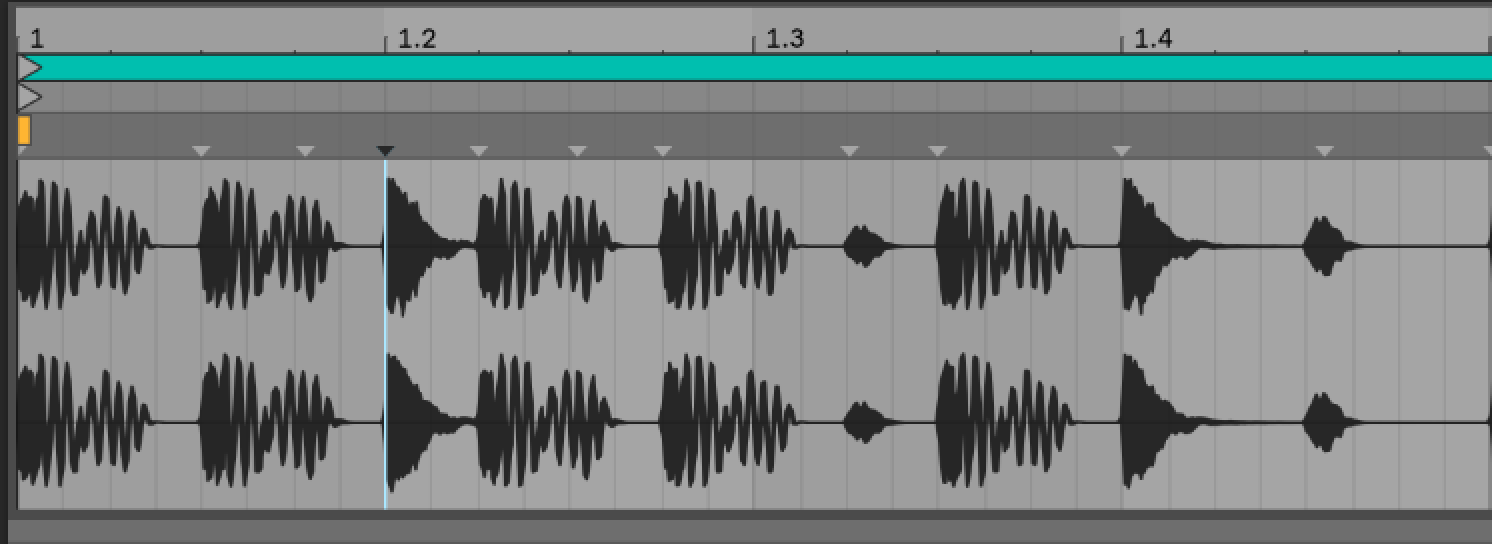
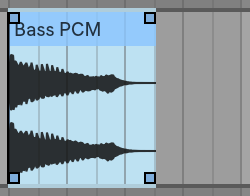
If we look at the waveform of our Warped clip in the clip view, we will notice a series of inverted triangles above our waveform: these are known as Transient Markers. These markers let you know that Ableton has detected a transient at that point.
By hovering over any Transient Marker, we have the ability to create a Warp Marker - either by double clicking the Transient Marker or simply by dragging the Transient Marker. We can also create Warp Markers anywhere in our Sample Editor, by double clicking on the desired selection - a Warp Marker is created immediately.
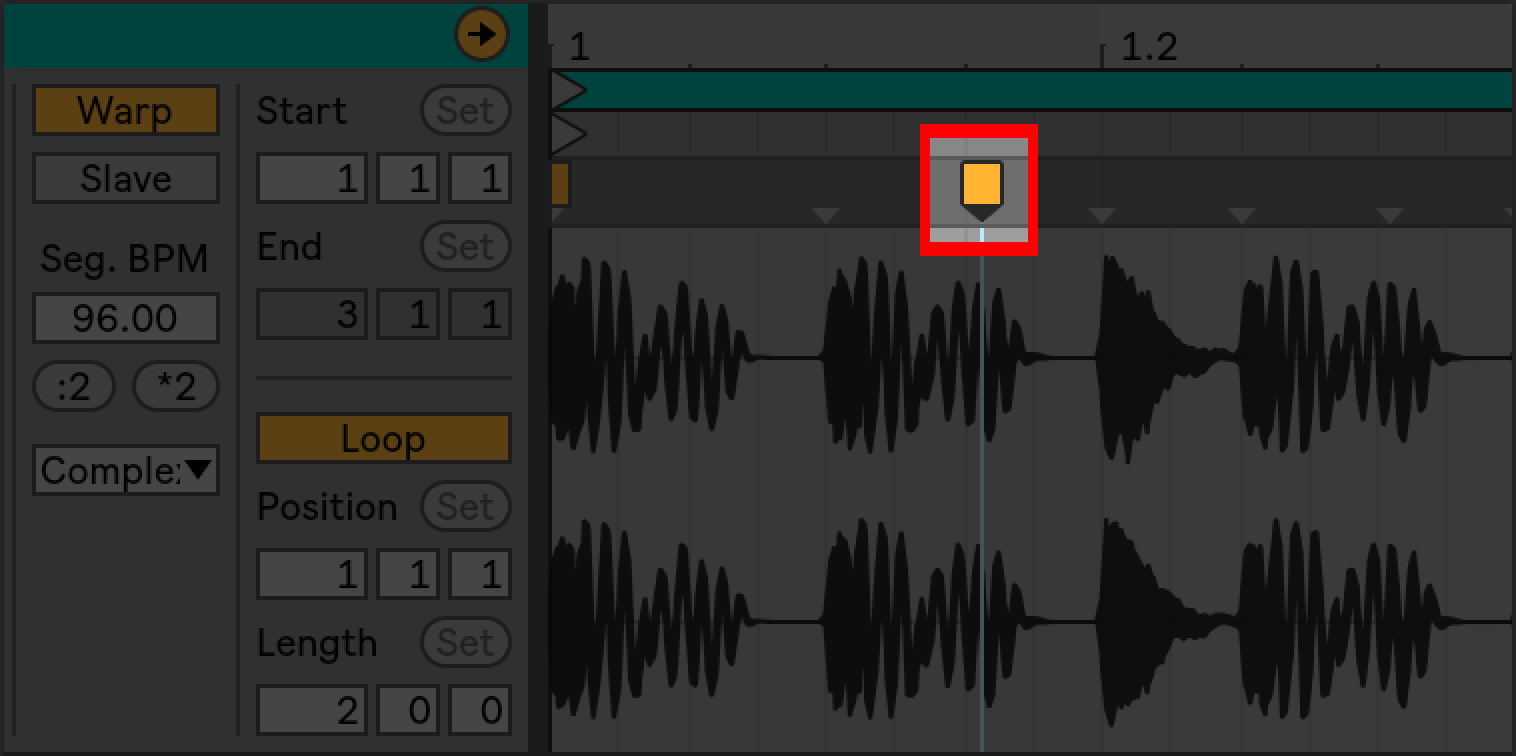
A Warp Marker pins a location within the sample to a specific beat time - thus if we simply have a Warp Marker at the beginning and end, we are pinning that entire sample to a specific beat time. By dragging either of these Warp Markers left or right, we can change the speed of the playback of our sample. By doing this, we are demonstrating the basic principle of Warping - time-stretching audio.
Warp Markers also allow you to isolate and change the speed of certain parts of a sample without affecting the speed of the rest of the sample. Say for example we wanted to time-stretch the first beat of our Dirty Neptunes sample, without affecting the play back speed of the rest of the bar.
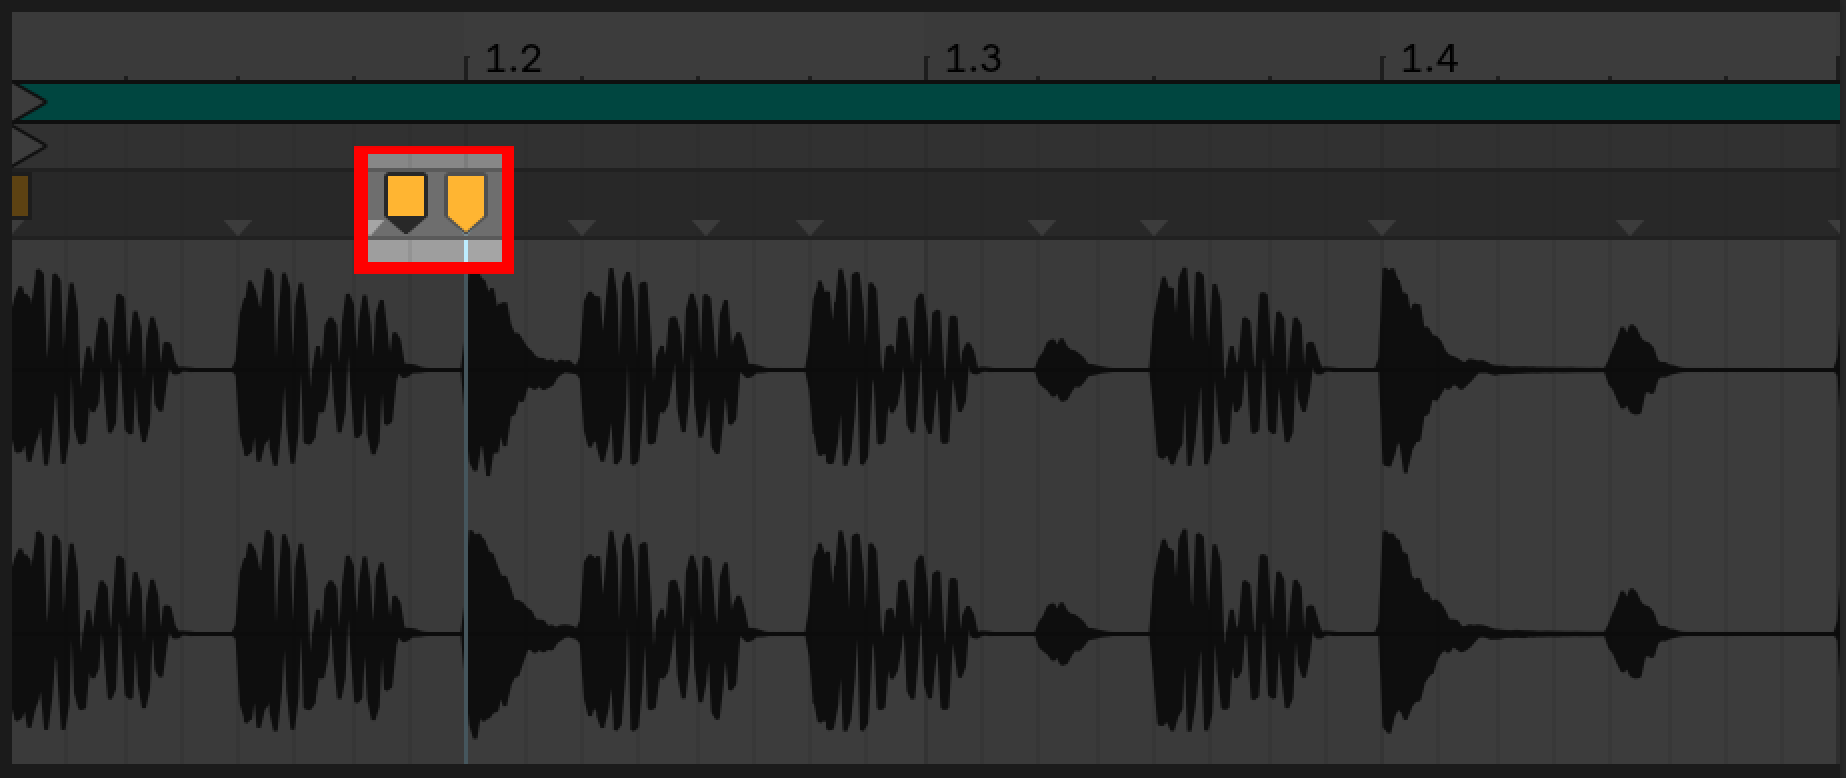
LTo do this, we need to create two Warp Markers - one to time-stretch, and one to isolate the rest of our bar and leave it unaffected by the time-stretch. The Warp Marker on the left allows us to time-stretch our audio, whilst the Warp Marker on the right isolates the rest of our bar from our time-stretching process.
With Warp Markers, all sorts of possibilities begin to open up - Warping acapellas and stretching out certain phrases, creating time-stretched drum fills, making rhythms out of recorded foley sounds such as bird chirps…. the possibilities are endless! Warp Markers can also be a useful corrective tool for when working with recordings where some notes are played too early or too late, and you need to adjust single transients without affecting the timing of the loop overall.
Double Time and Half Time and Warping in Arrangement View
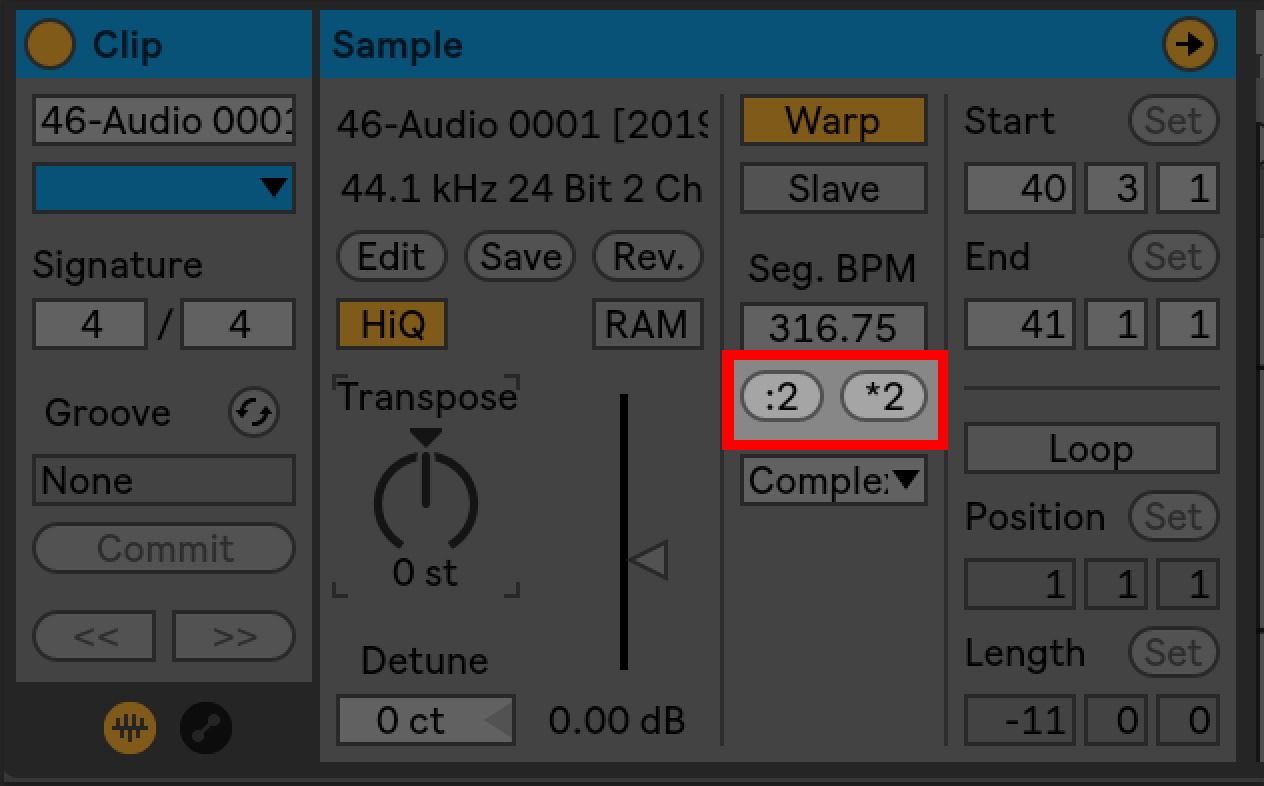
Outside of Warp Markers, you can also Warp audio clips inside the previously mentioned Warp Menu, using the Double Time and Half Time controls.
Double Time and Half Time are quick and efficient ways of yielding time-based changes in our audio sample. The controls are self explanatory - Half Time stretches the audio sample to twice it’s original length, whilst Double Time does the opposite, compressing the sample so it’s playback speed is twice as fast as the original sample. These two controls allow you to drastically alter samples really quickly, and are great tools to use if you want to extrapolate new and interesting timbres from your existing samples and get inspiration fast.
Ableton 10 also gives you the ability to Warp samples in the Arrangement View. By hovering over a sample with the resize icon (top half of the clip) and then dragging whilst holding shift, we can time-stretch our audio clips. Like any Arrangement View based function, the time-stretch will always snap to the grid of your project - to avoid this, we can either toggle our grid off or hold command (turns off the grid whilst dragging) as we enact our time-stretch. Whilst less detailed and nuanced than Warping in the Sample Editor view, this technique is a very quick way of enacting time-stretching on audio samples.
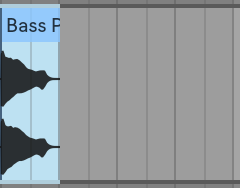
Warping samples in the arrangement view - before and after the time-stretch. Note that this process only works if the desired audio clip’s Warp Menu is switched on.
The rest of the Warp Menu explained
Let’s take a look at the rest of our Warp Menu, and the controls available to us.
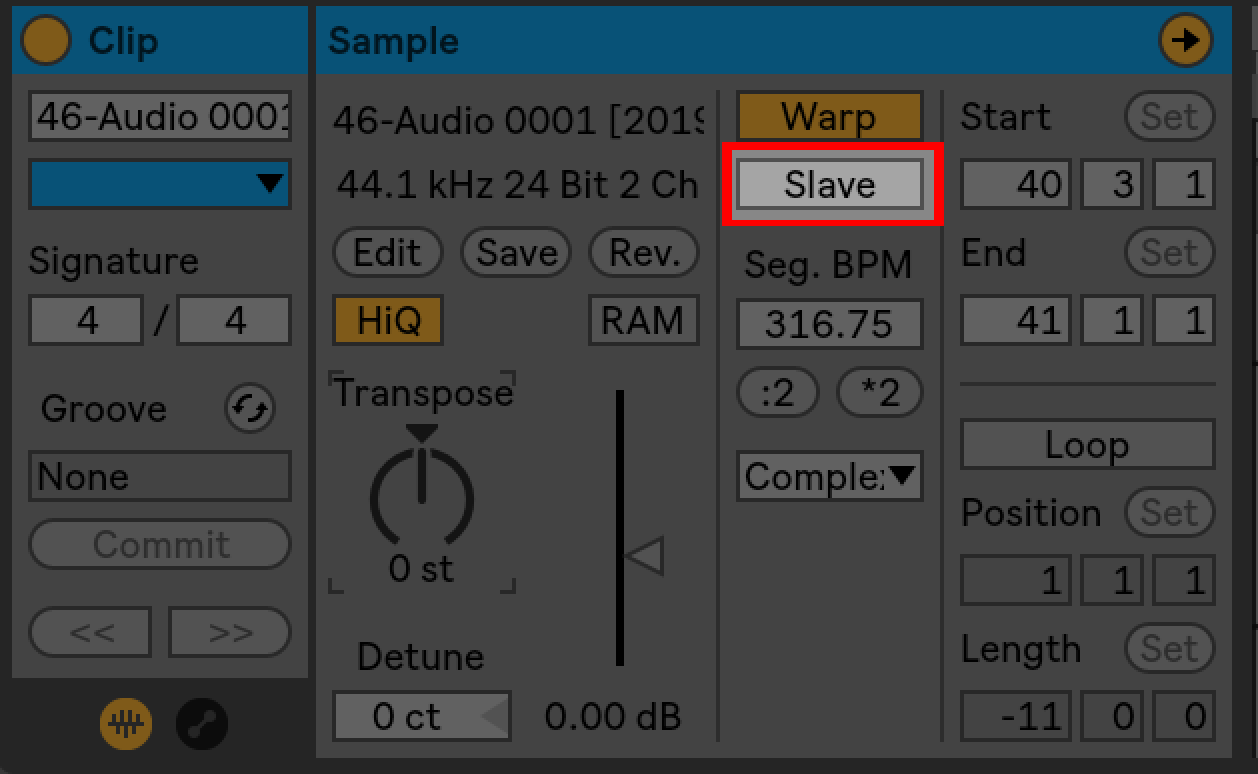
Slave: When set to Slave, an audio clip is Warped so it plays in sync with the rest of our project when Warp is turned on. This is the default for a Warped clip. Pressing the Slave button activates Master - when set to this, the clip plays at it’s natural tempo (as if Warp was off) and the set’s tempo is adjusted to match that of the clip. Generally when using Warp, there is no reason to use Master - you want your clips to adhere to the tempo of your overall project, not the other way round.
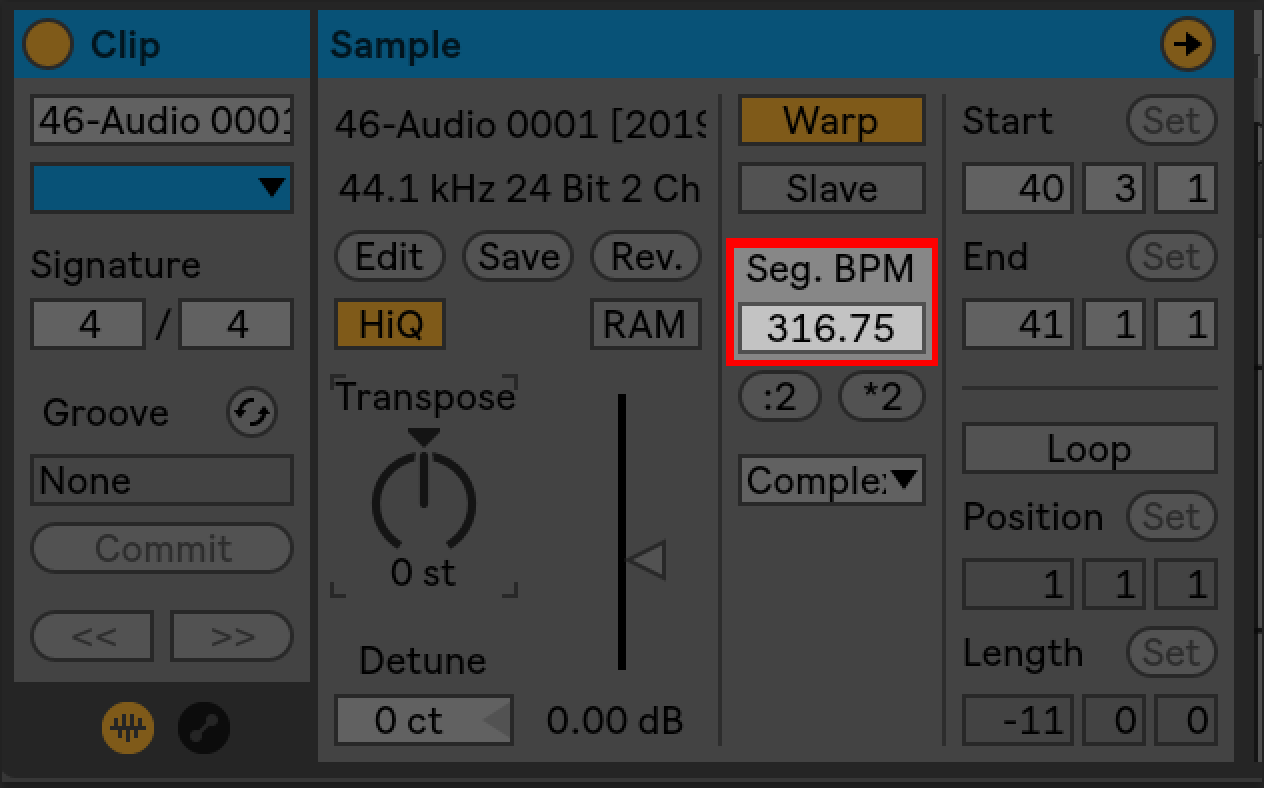
Segment BPM: Segment BPM show’s Live’s guess at the tempo of your original sample, so it can then time-stretch it so it plays in sync with the project. You can actually use this tool to time-stretch audio as well - increasing the BPM will stretch out the sample so it plays for longer, and vice-versa.
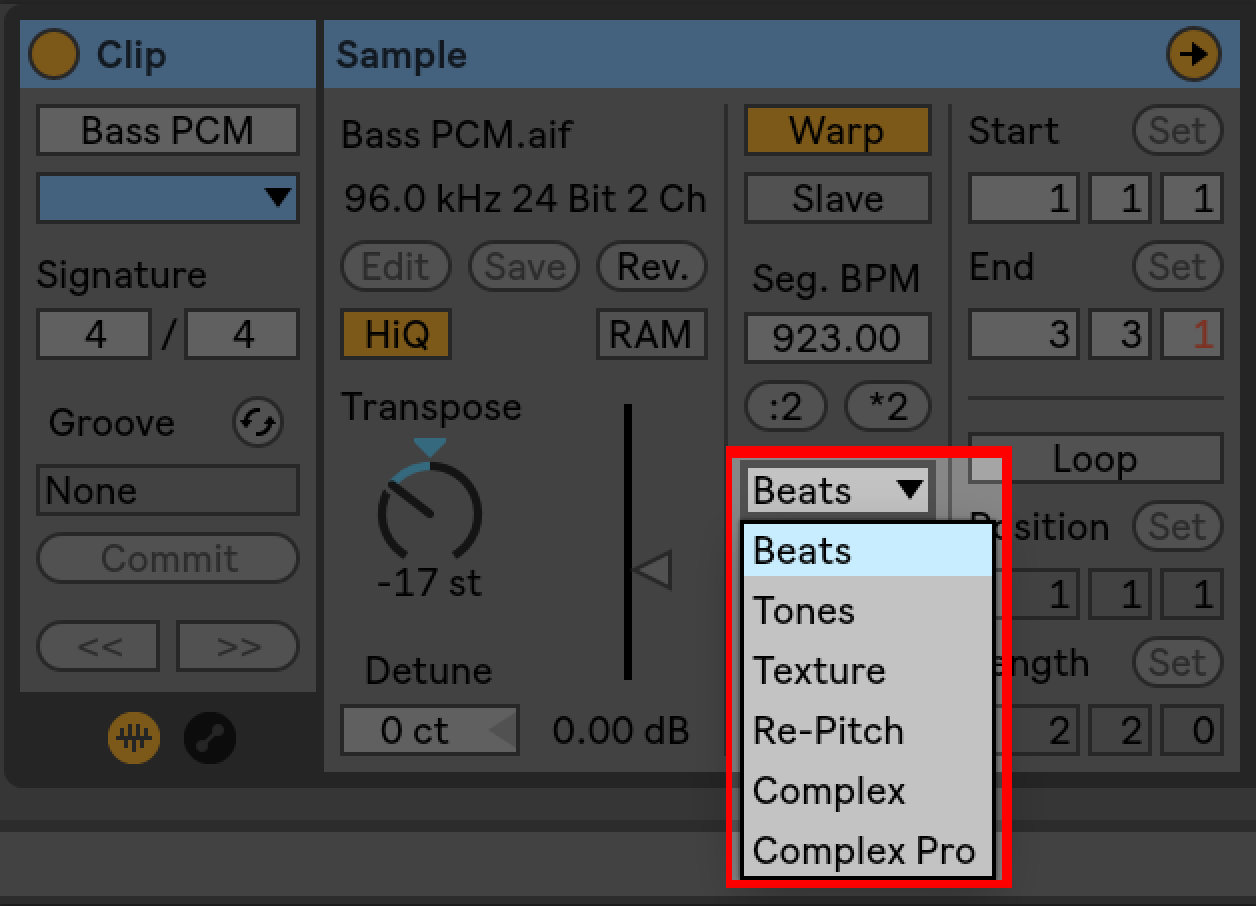
Warp Mode: When clicked, this small box displays several different Warp Modes, each of which time-stretch our audio in different ways, and with certain functions in mind. Each algorithm behaves in a different way, and each provides different advantages. Below is a video which explains each of these different Warp Modes in detail.
SK Warping Algorithms Explained here.
Conclusion:
Warping is an exciting tool inside Ableton which permits a huge amount of time-stretching power when working with Audio Clips. Everything from corrective adjustments for a drum loop playing slightly out of time to extrapolating new timbres from your existing samples is possible when using Warp.
After reading this article, you should feel comfortable with understanding the controls inside Warp Menu, using Warp Markers to time-stretch audio inside the Sample Editor, and how to quickly time-stretch audio in the Arrangement View. Whilst there’s much more to explore, especially in terms of the different Warp Modes and the way in which they affect sounds differently, you should now be at the stage where you can use Warp effectively.
A Final Thought:
I think one of the most interesting uses of Warp is as a creative tool, used to make new timbres and sounds from existing samples to use in your music. The best way to create abstract sounds from original samples is to push Warping to it’s limits - therefore, time-stretching audio to the extreme yields some of the most exciting results.
Once you have created something you are excited by, you can then consolidate your Warped clip (click on the desired clip and press Ctrl+ J on PC, Command+J on Mac), which will then print your abstracted sample and save it permanently as a new Audio Clip to use (or further abstract!) in your project. Push Warp to it’s limits, and see what exciting results you can get.
Our customers love MusicTeachers.co.uk!
"Really friendly staff, super fast communication and truly reliable. Highly recommended!"
5 out of 5
Jack - Student at MusicTeachers.co.uk
If you thought this article was useful, you might also find the following interesting…
Who Are We?
The office team of MusicTeachers.co.uk are all professional musicians and educators. We also believe that we have the best job in the world. We get to spend our day talking to students across the country about how much they love music and we have helped hundreds of people connect with the perfect, professional teacher for them. We'd love to help you too! Please get in touch with us and tell us your story. 07946125613 Or send us a mail to [email protected]. We can't wait to hear from you!