How Do I Schedule New Lessons?
How Do I Schedule Lessons with my Students?
Before you are able to schedule lessons with your students, a few things need to be in place:
If you need to reschedule or cancel existing lessons, see our guide on that instead.
The rest of this guide will assume that all of these steps are in place. If any of these steps are not yet in place, please contact your music service/hub.
Here's a video that will help you book a new lesson. If you are still in need of help, read on for more information:
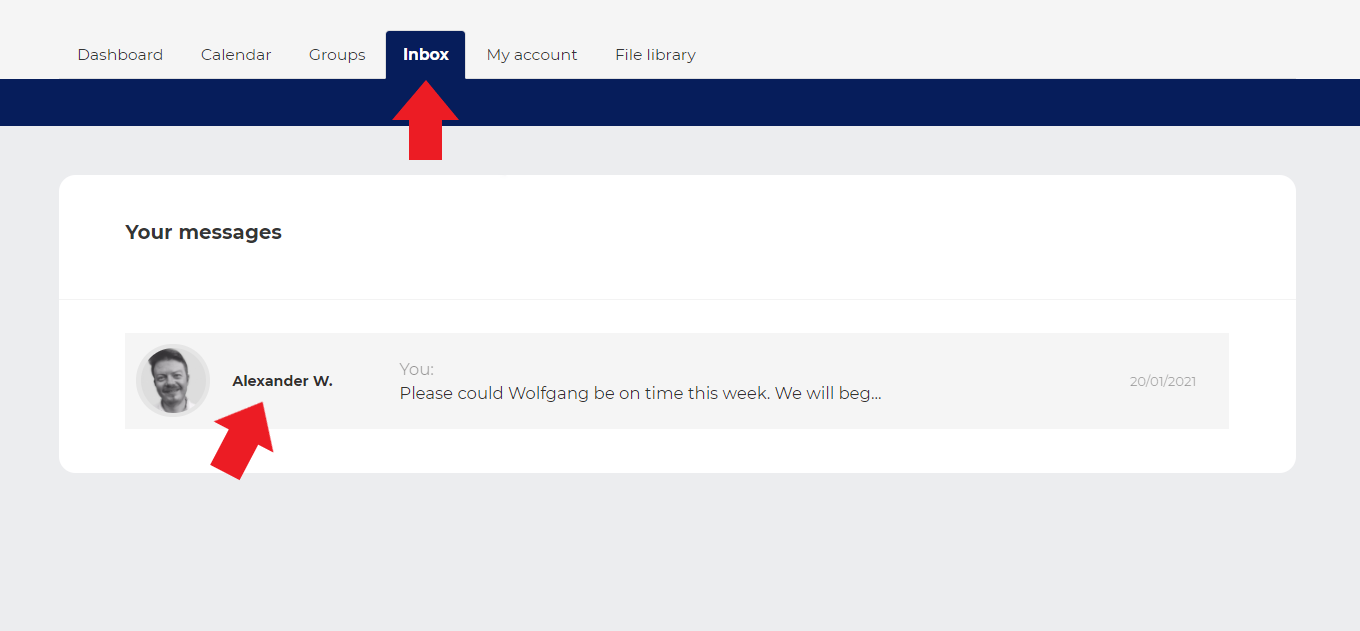
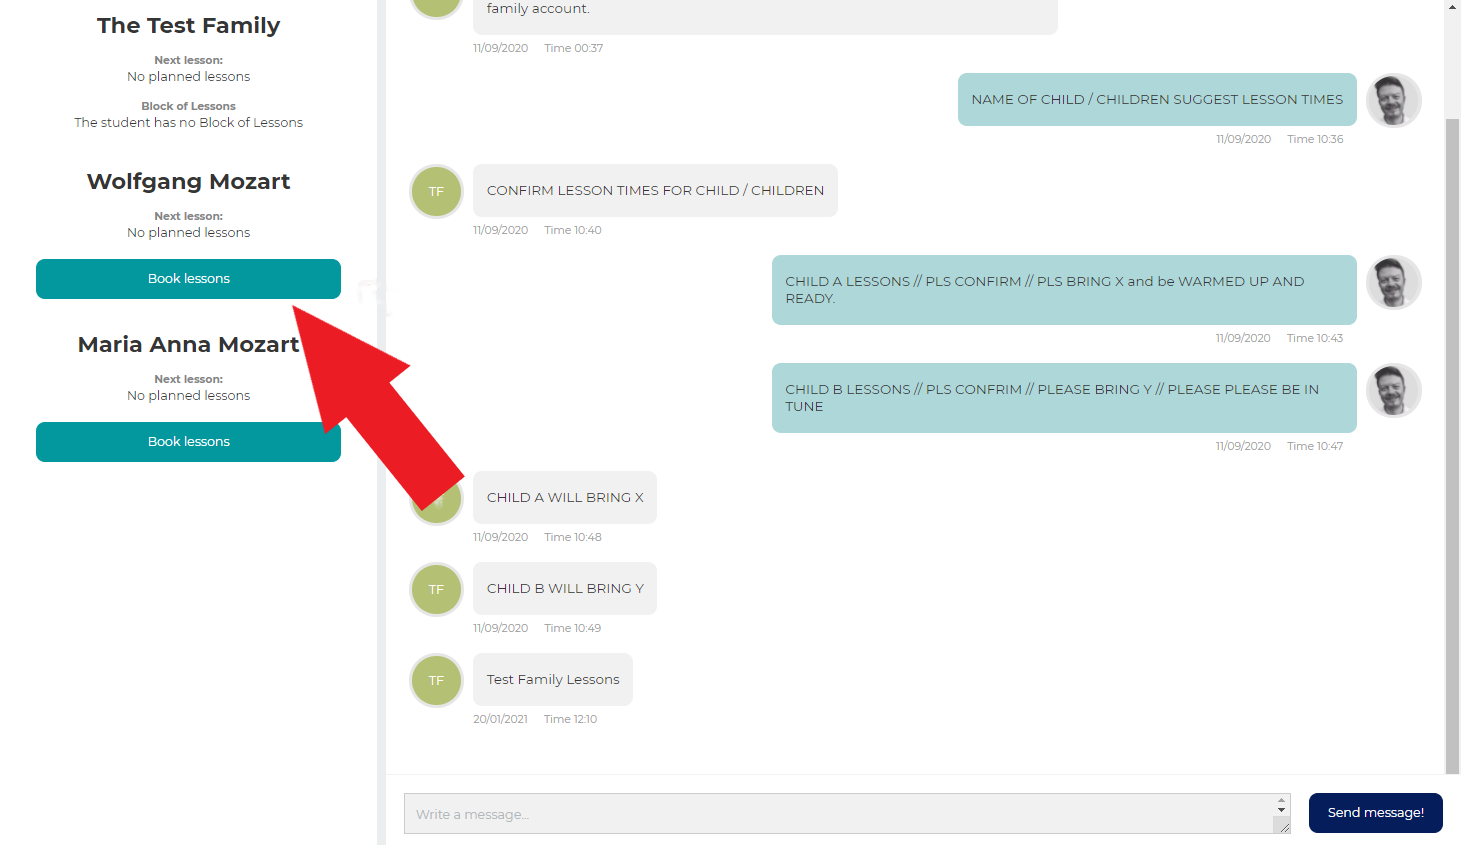
Step 1 - Navigate to the Lesson Booking Screen
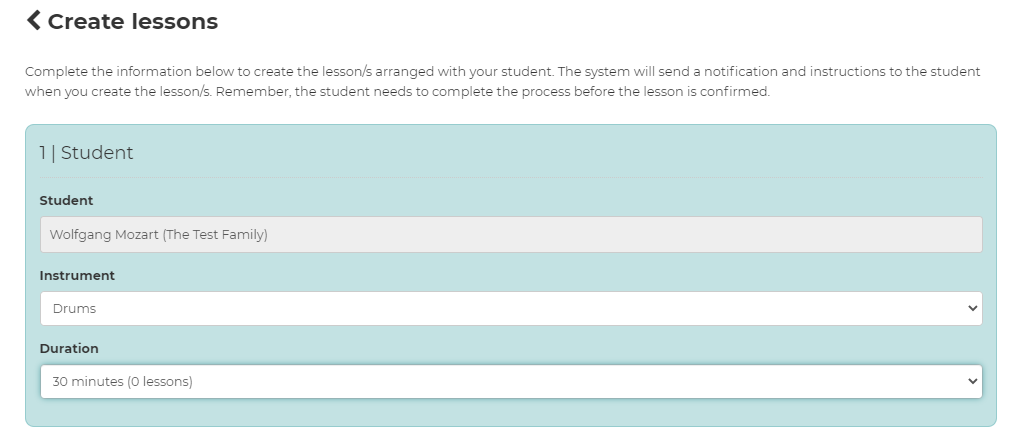
Step 2 - Input Rudimentary Information
In the lesson booking screen, use the drop-down menus to fill in the details of your lesson(s):
Step 3 - Plot Dates and Times on the Calendar.
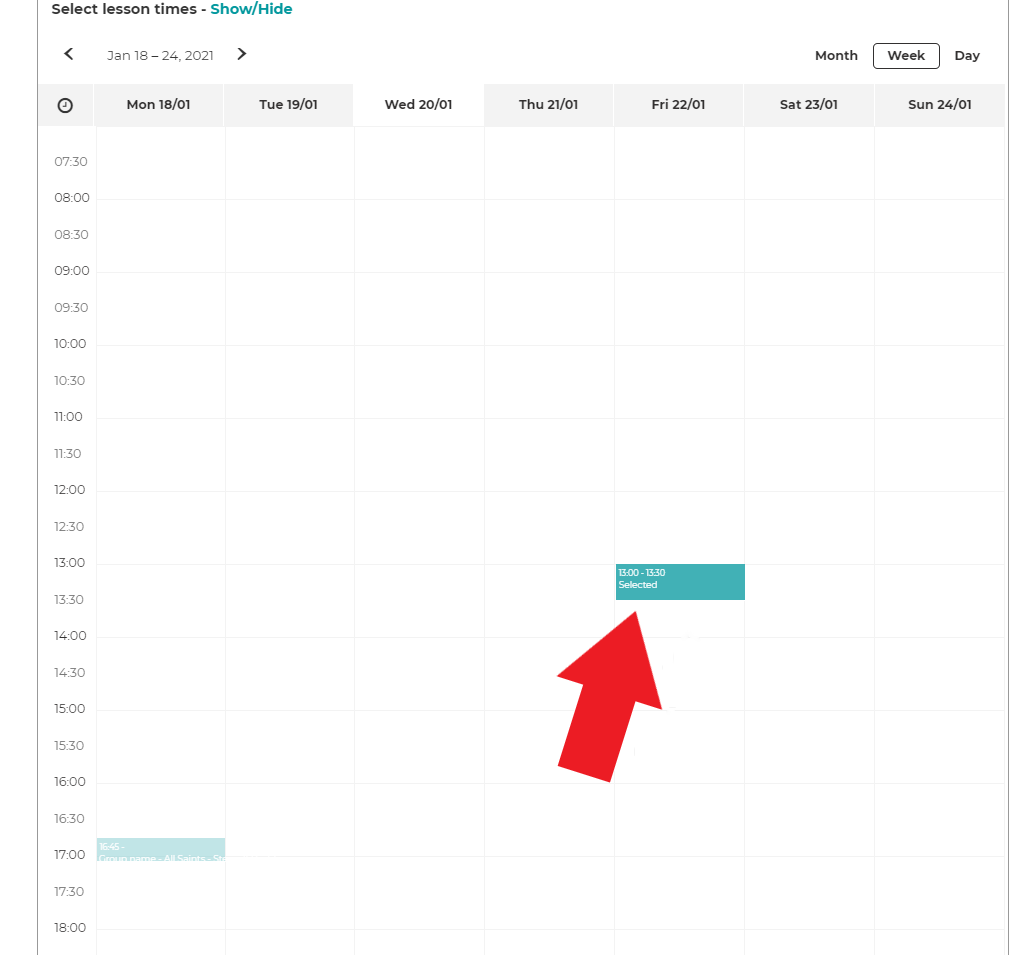
If you scroll down, you’ll see that there’s a calendar provided.
Simply click on the calendar at the right date & time - see the time increments on the left, and the dates across the top. (You can select exact times in the next step, so don’t worry if it’s not quite right). You can toggle the week view by using the arrows at the top.
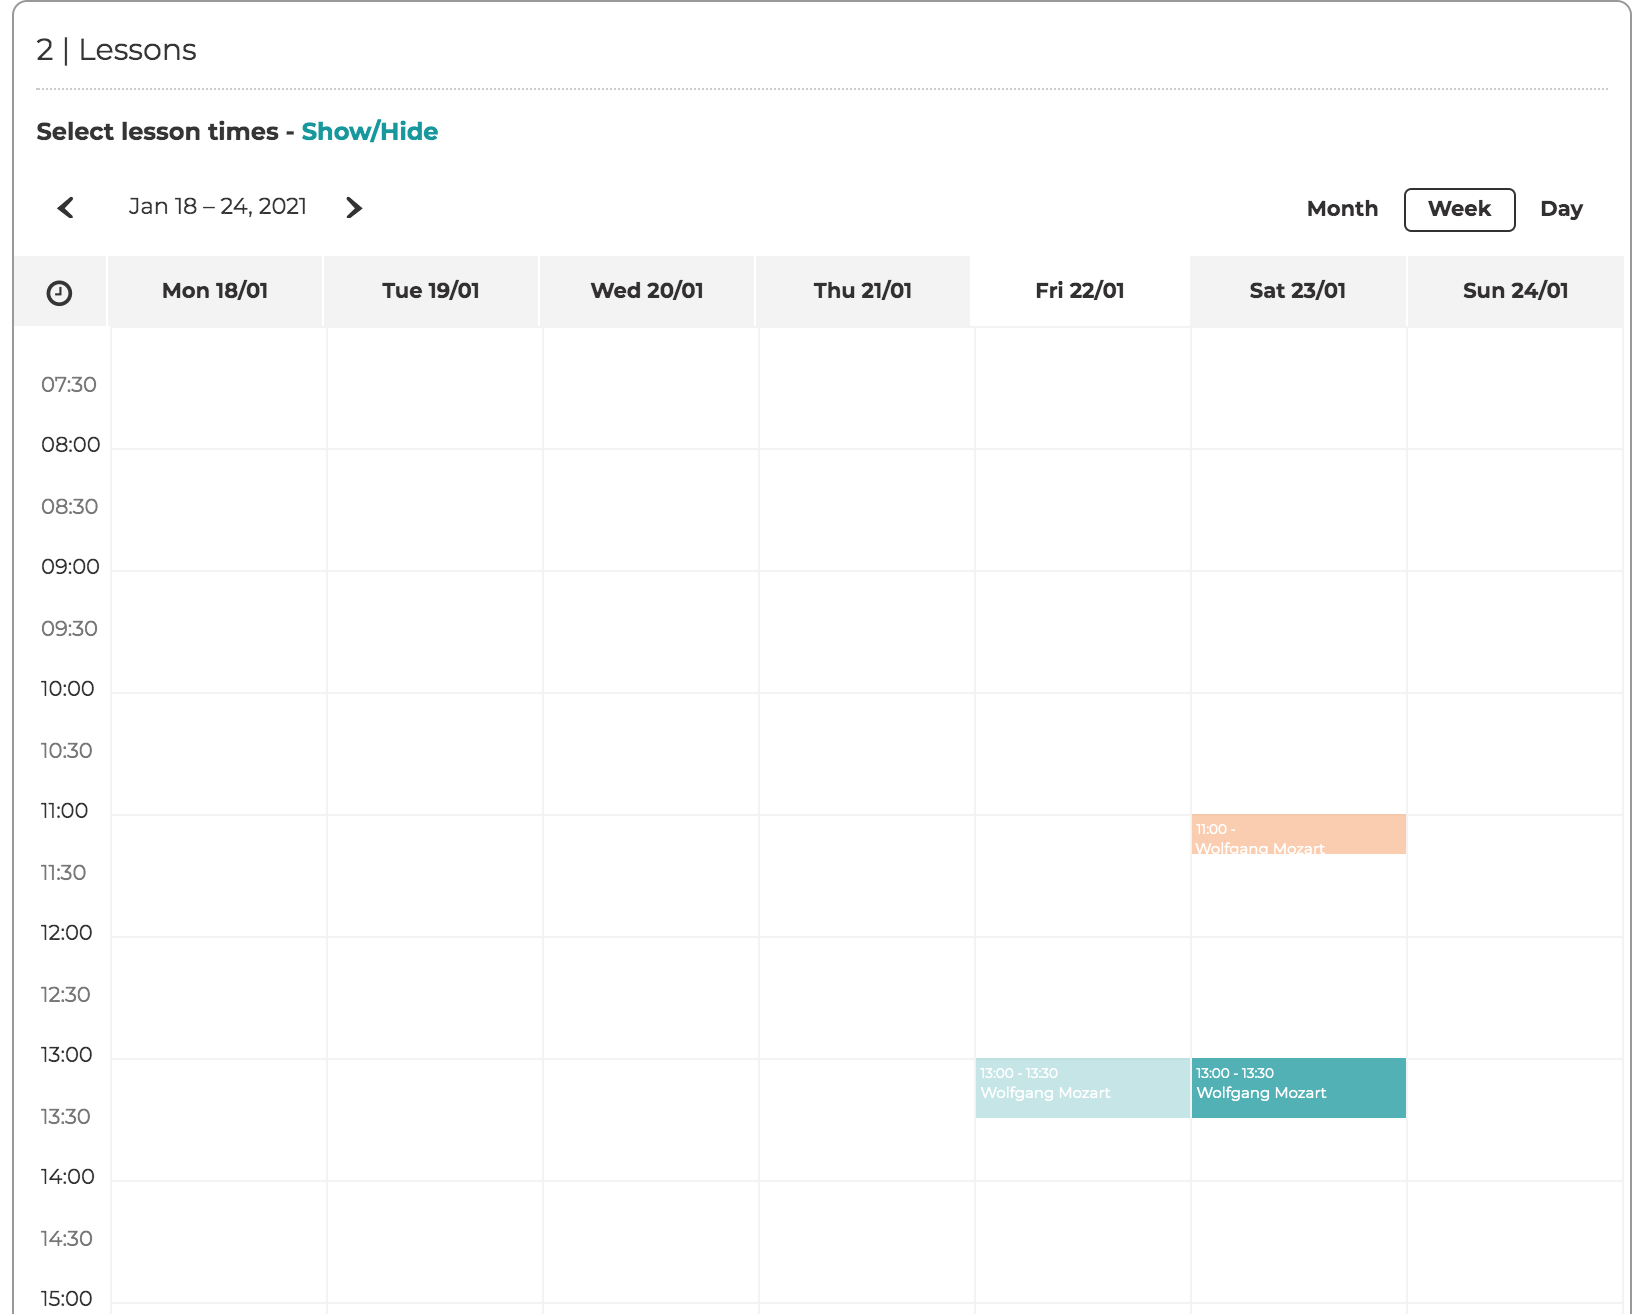
This will create a popup, allowing you to:
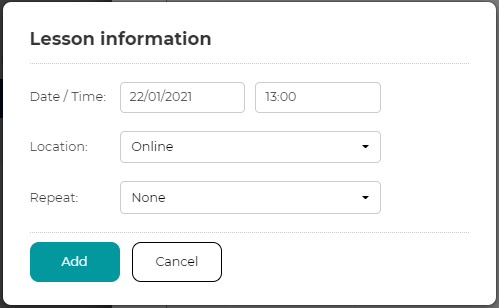
Once a lesson’s information has been input, it will appear on the calendar as a dark blue rectangle.
Once all lessons (the same number you listed in step 3) have been added to the calendar, you will be taken automatically to step 4.
Step 4 - Confirm Details and Send to Student
Review the lesson information and adjust if necessary from the drop-down menu. Check the location of the lesson is set as “online”
Add any notes relating to lesson planning, resources to have ready, and also instruct the student on their next steps.
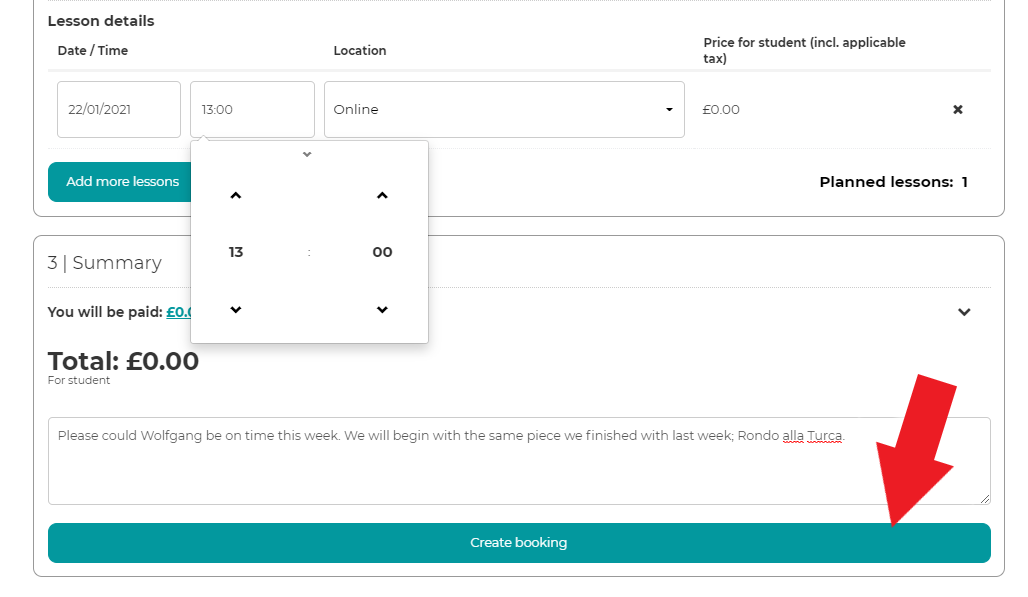
Step 5 - Send the Lesson to the Student
Press the blue button ‘Create Booking’ to send the lesson to the student!
Ok - The lesson has been created. What happens next?
Once the lesson has been created, it will be displayed in orange on your calendar. This means the lesson is “pending”.
The lesson is now sent to the student via an email notification. They now need to confirm the booking, at least 24 hours ahead of the start time. NB: For the spiring term of 2021 this settings has been reduced to 2hrs.
Once the booking is confirmed, you will receive a notification email, telling you the lesson is confirmed.
A link will appear on your dashboard (first screen when you log in). Clicking on this link a few minutes before the lesson will take you into the online classroom.
If the lesson is not confirmed by the student, it will be automatically cancelled, 24 hours (2hrs in Spring 2021) prior to the start time of the lesson. If this happens, send the student a message via your inbox to see if they would like to rebook.
Need more help?
Please contact your music service / hub for more information.